Protect my front-end application
Create a client
In order to use the Astran API V2.1, we should first create a client via the admin console. Clients are entities that can request authentication of a user.
Let's say, we want to protect a front-end application as Cockpit with the OpenID connect protocol. First, we should create a client via our admin console. If you don't know how to access your admin console, please refer to this
In your sidebar, click on clients. It will list all available clients in your realm as following:
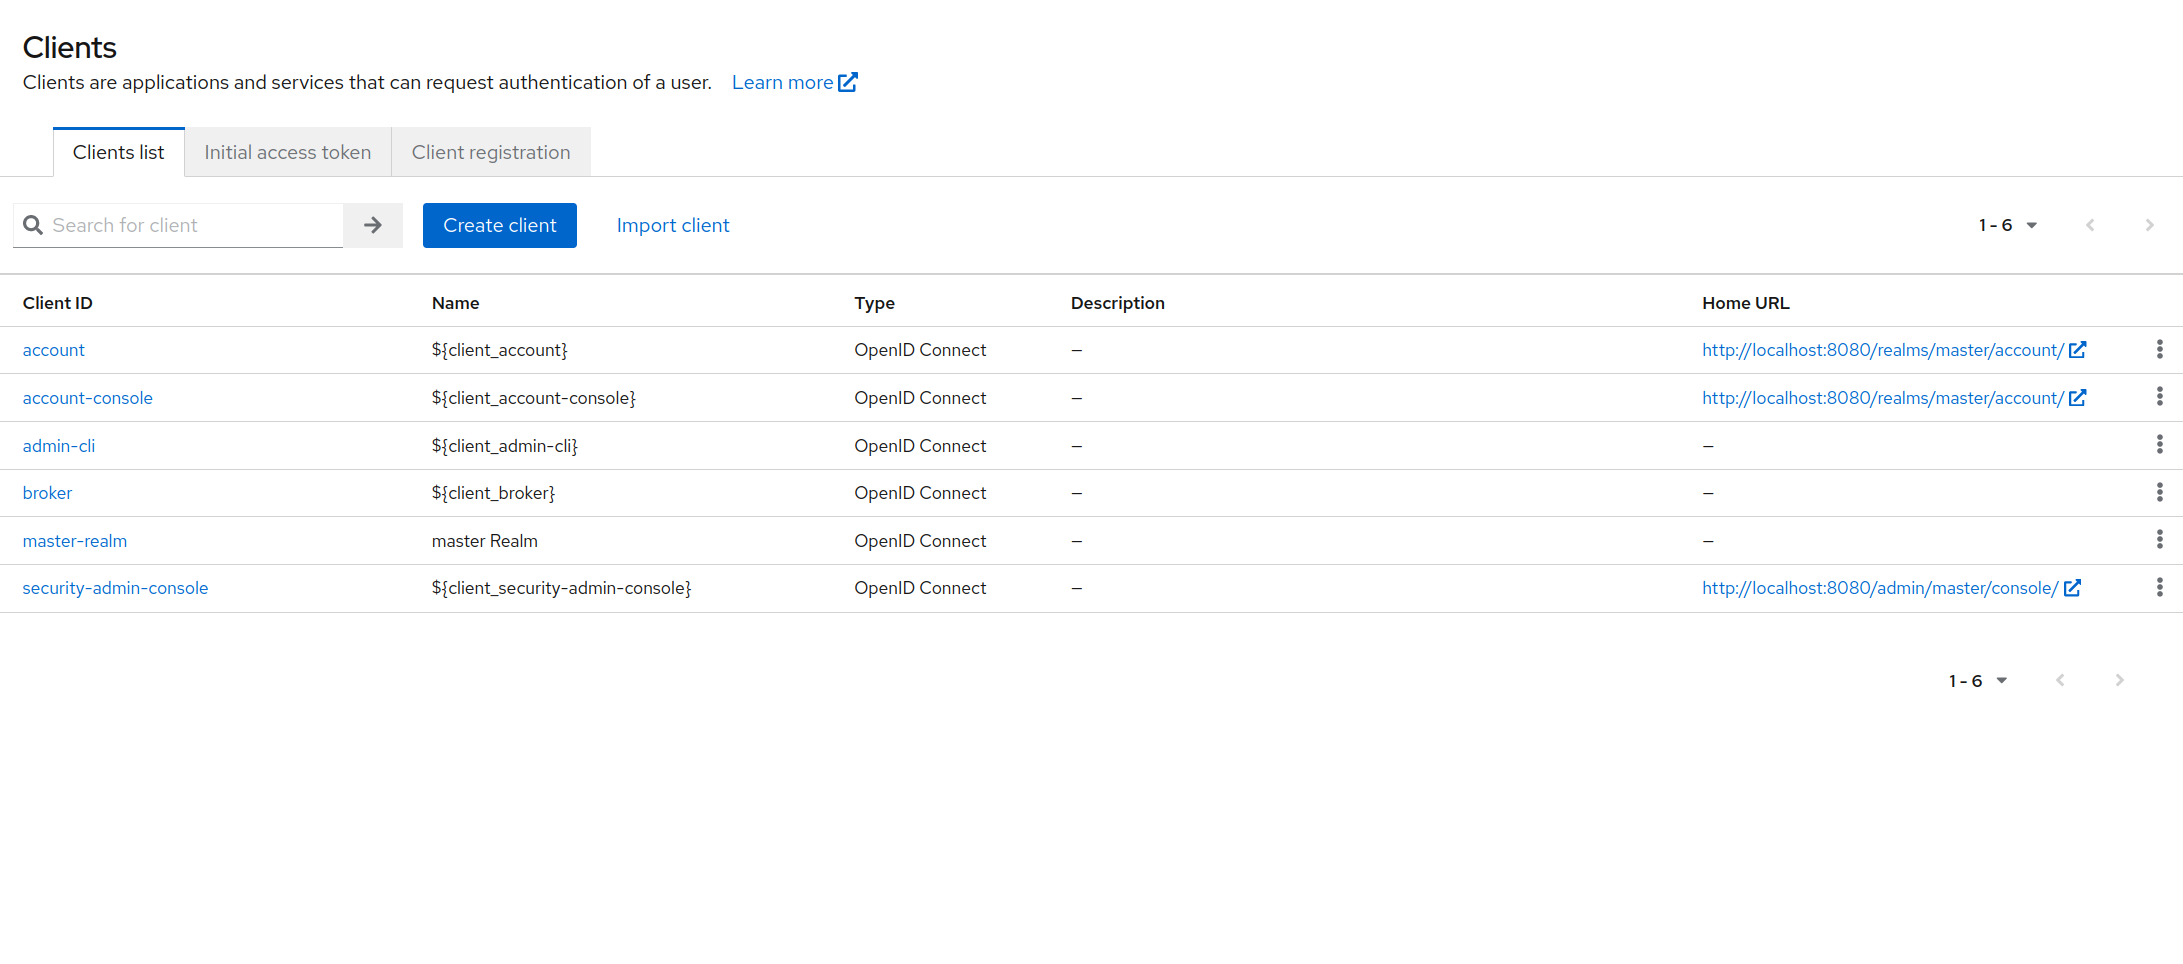
Client configuration
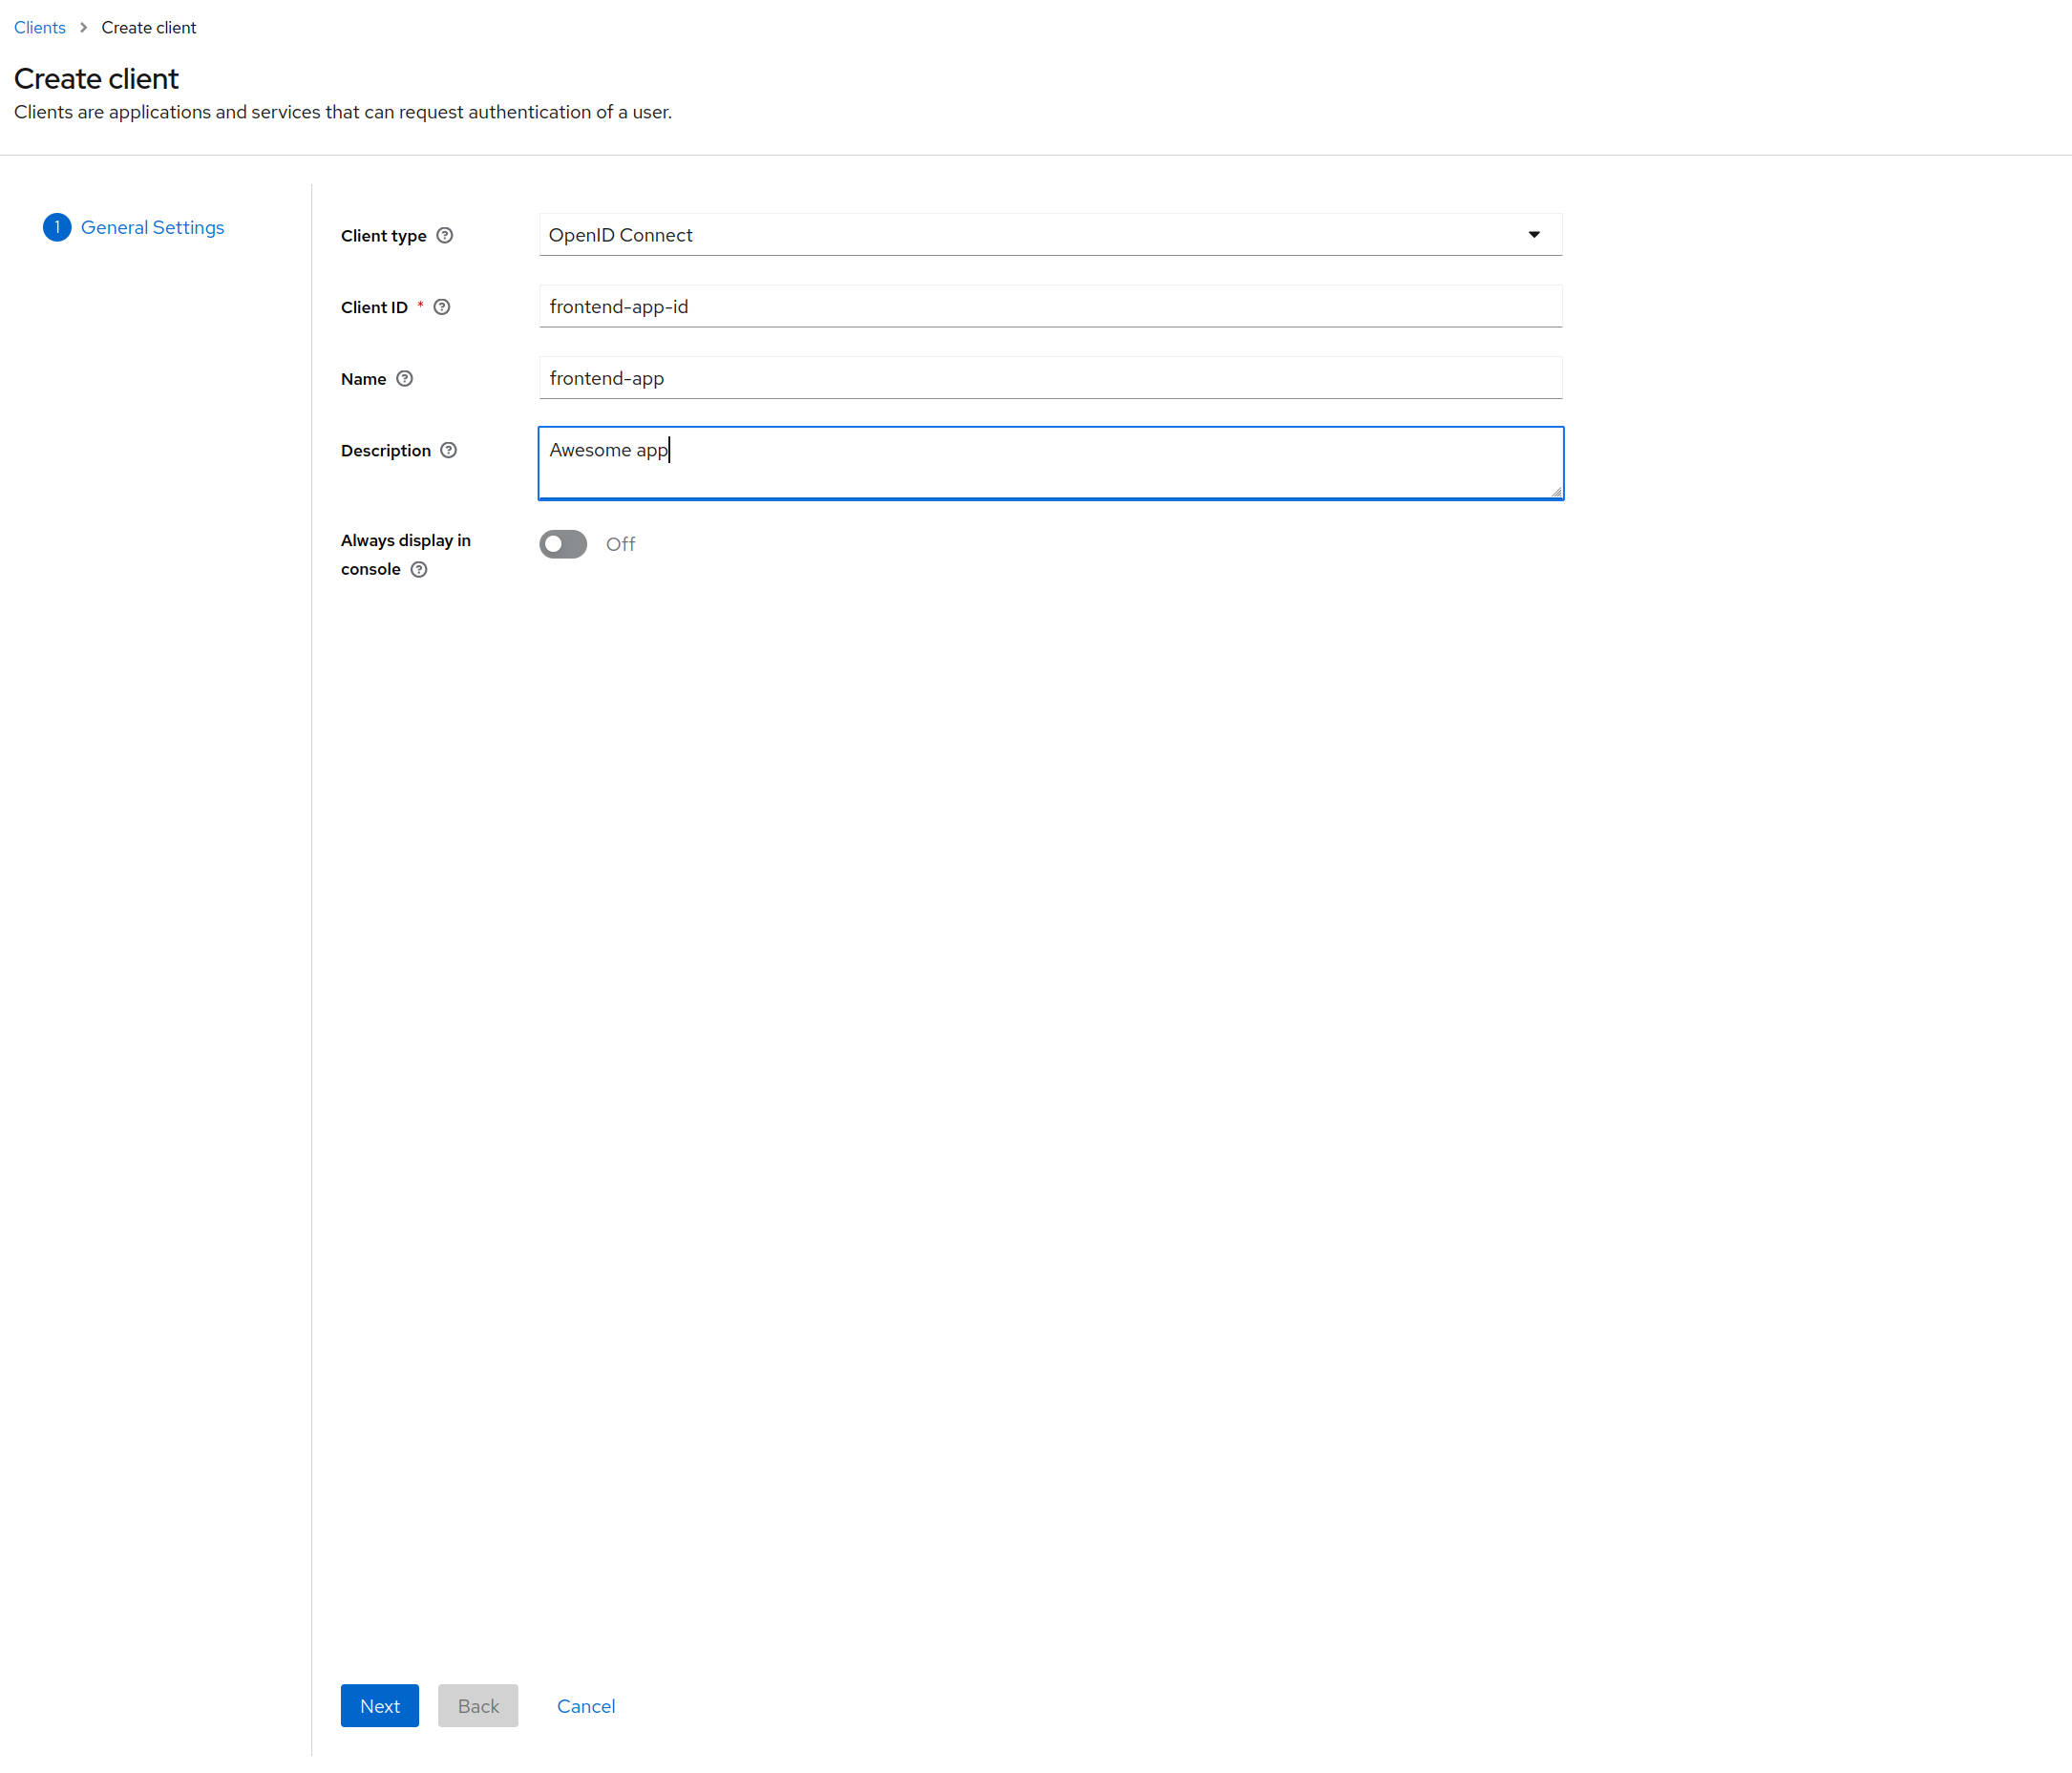
Now click on the button Create client to create a client and setup your client as following:
General settings
Here we're setting up an OpenID Connect client with frontend-app-id as client_ID.
This client ID is the most important information here.
You will use it after for the login.
Capability config
Now we have to decide which type of authentication flow we want. Here we choose the standard flow, which corresponds to the OAuth2 authorization code flow.
For more informations about this flow see Oauth2 Authorization Code Flow
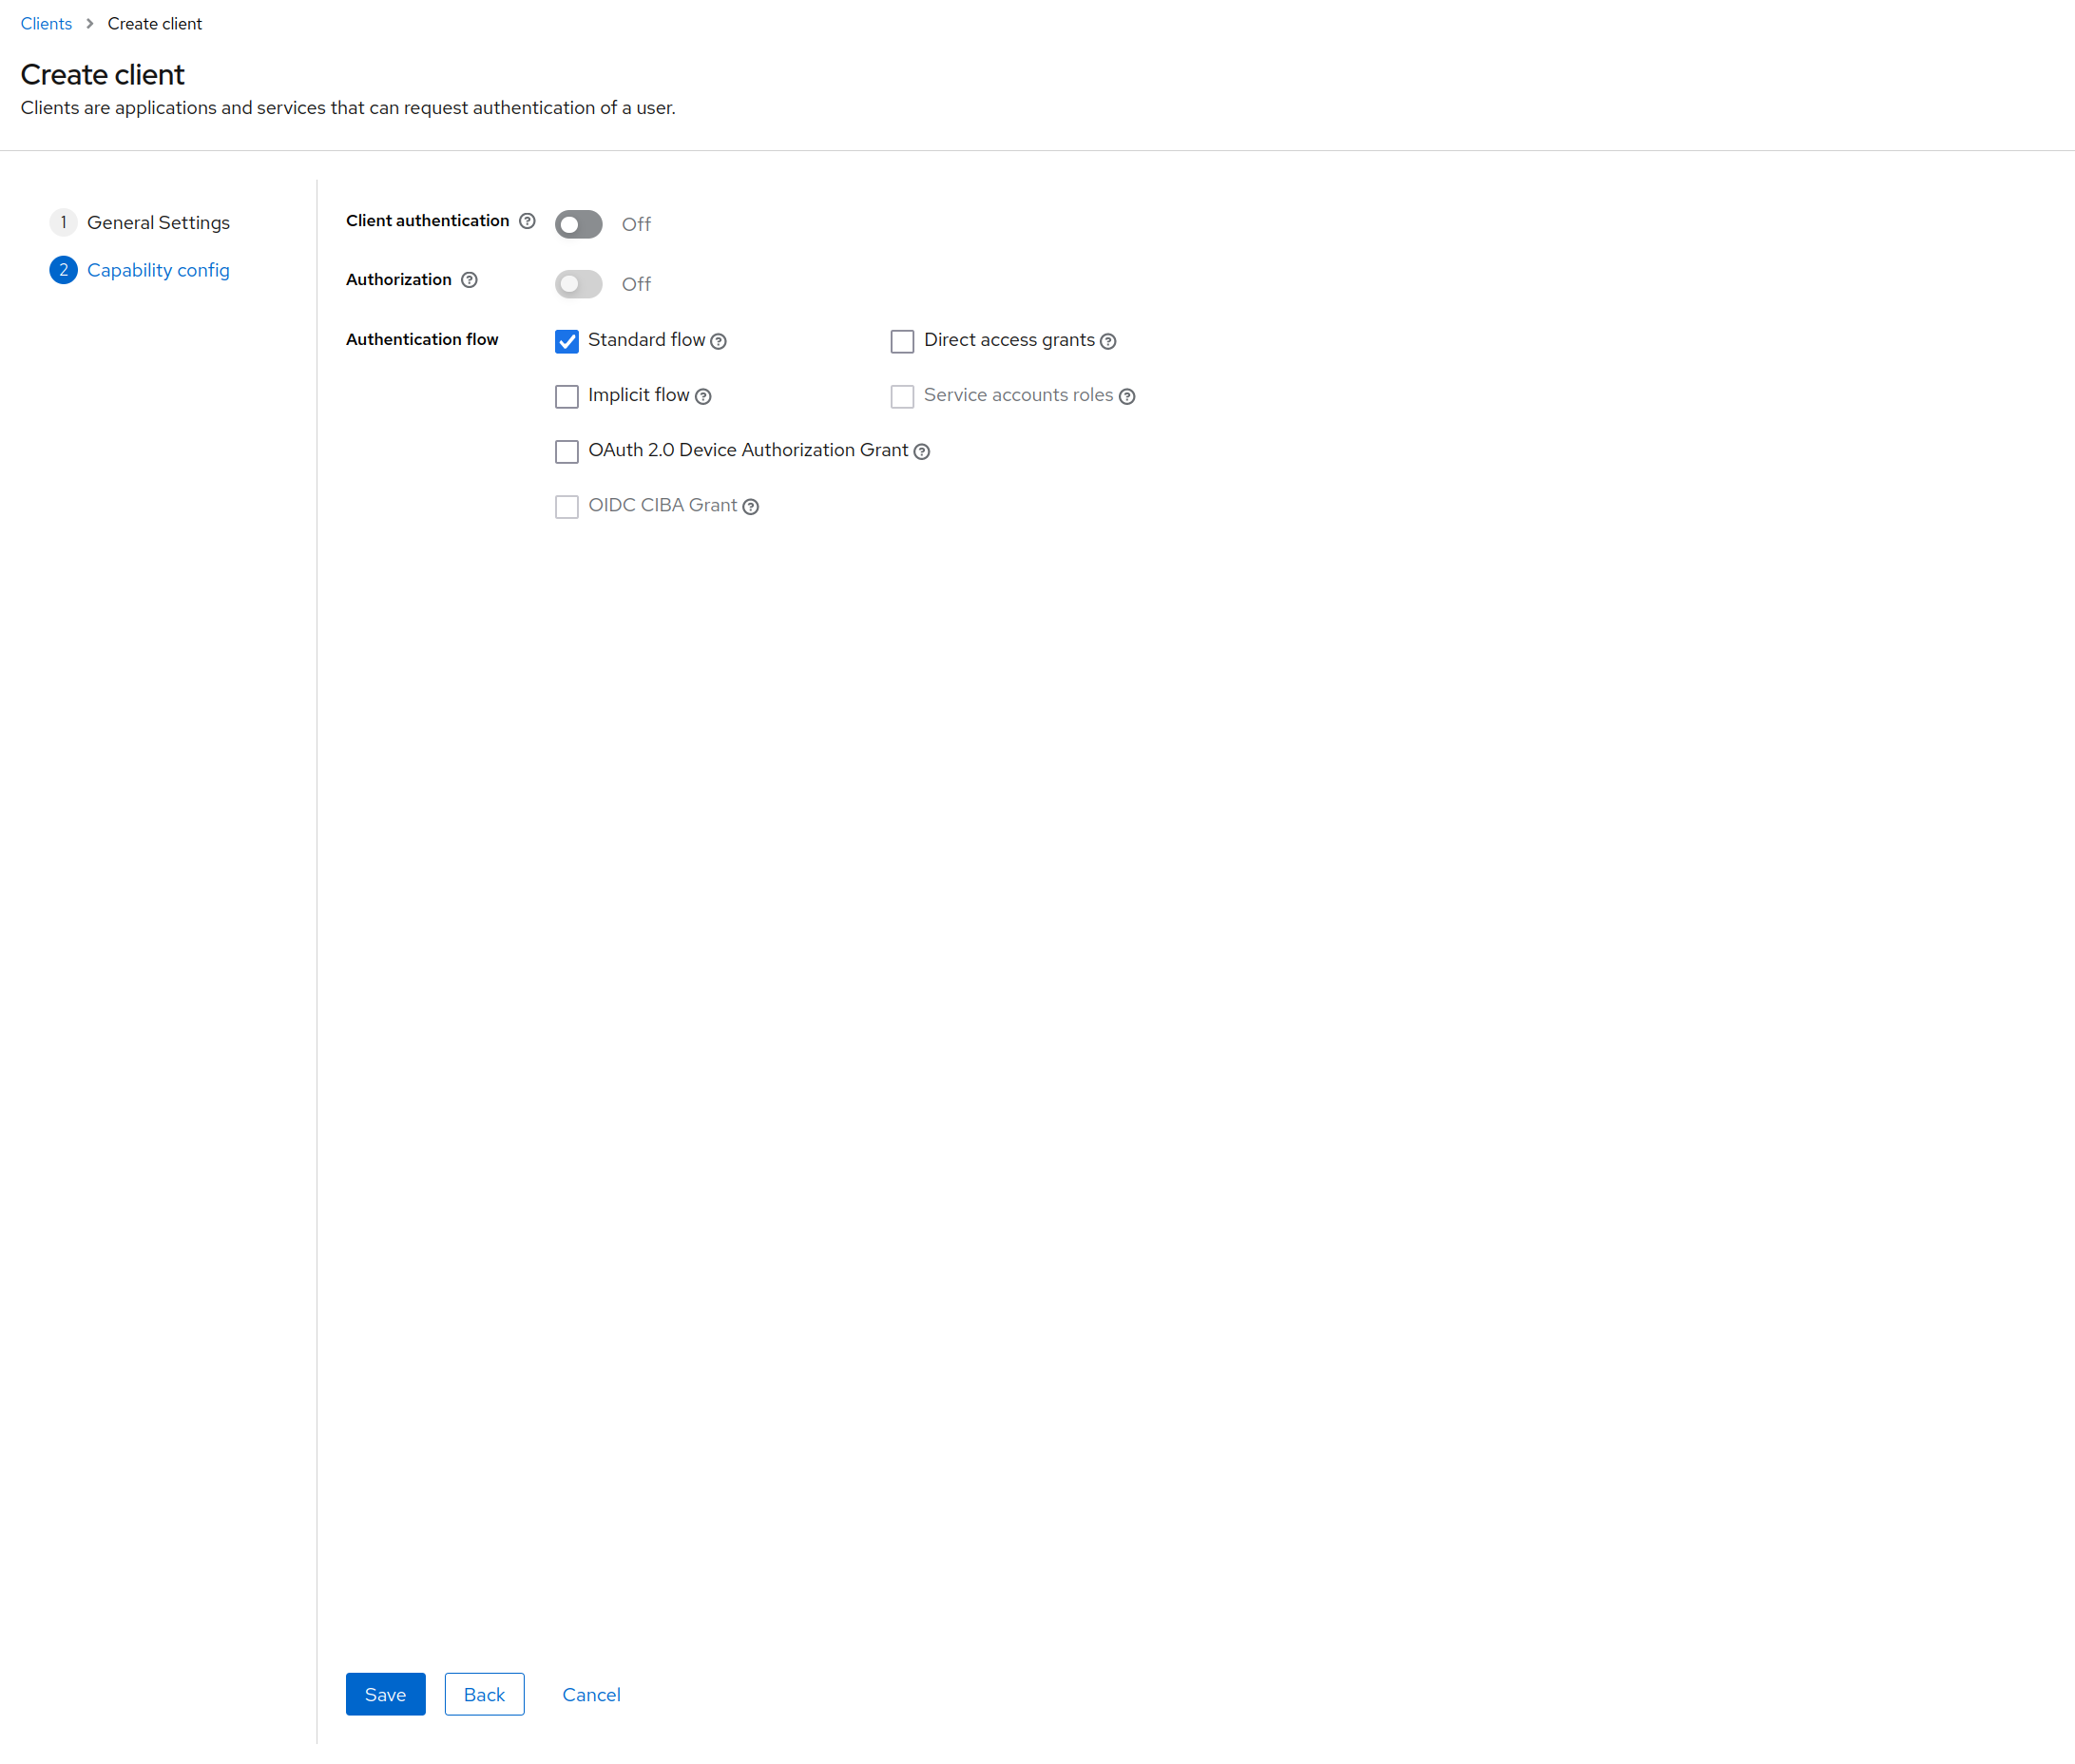
Click on the save button
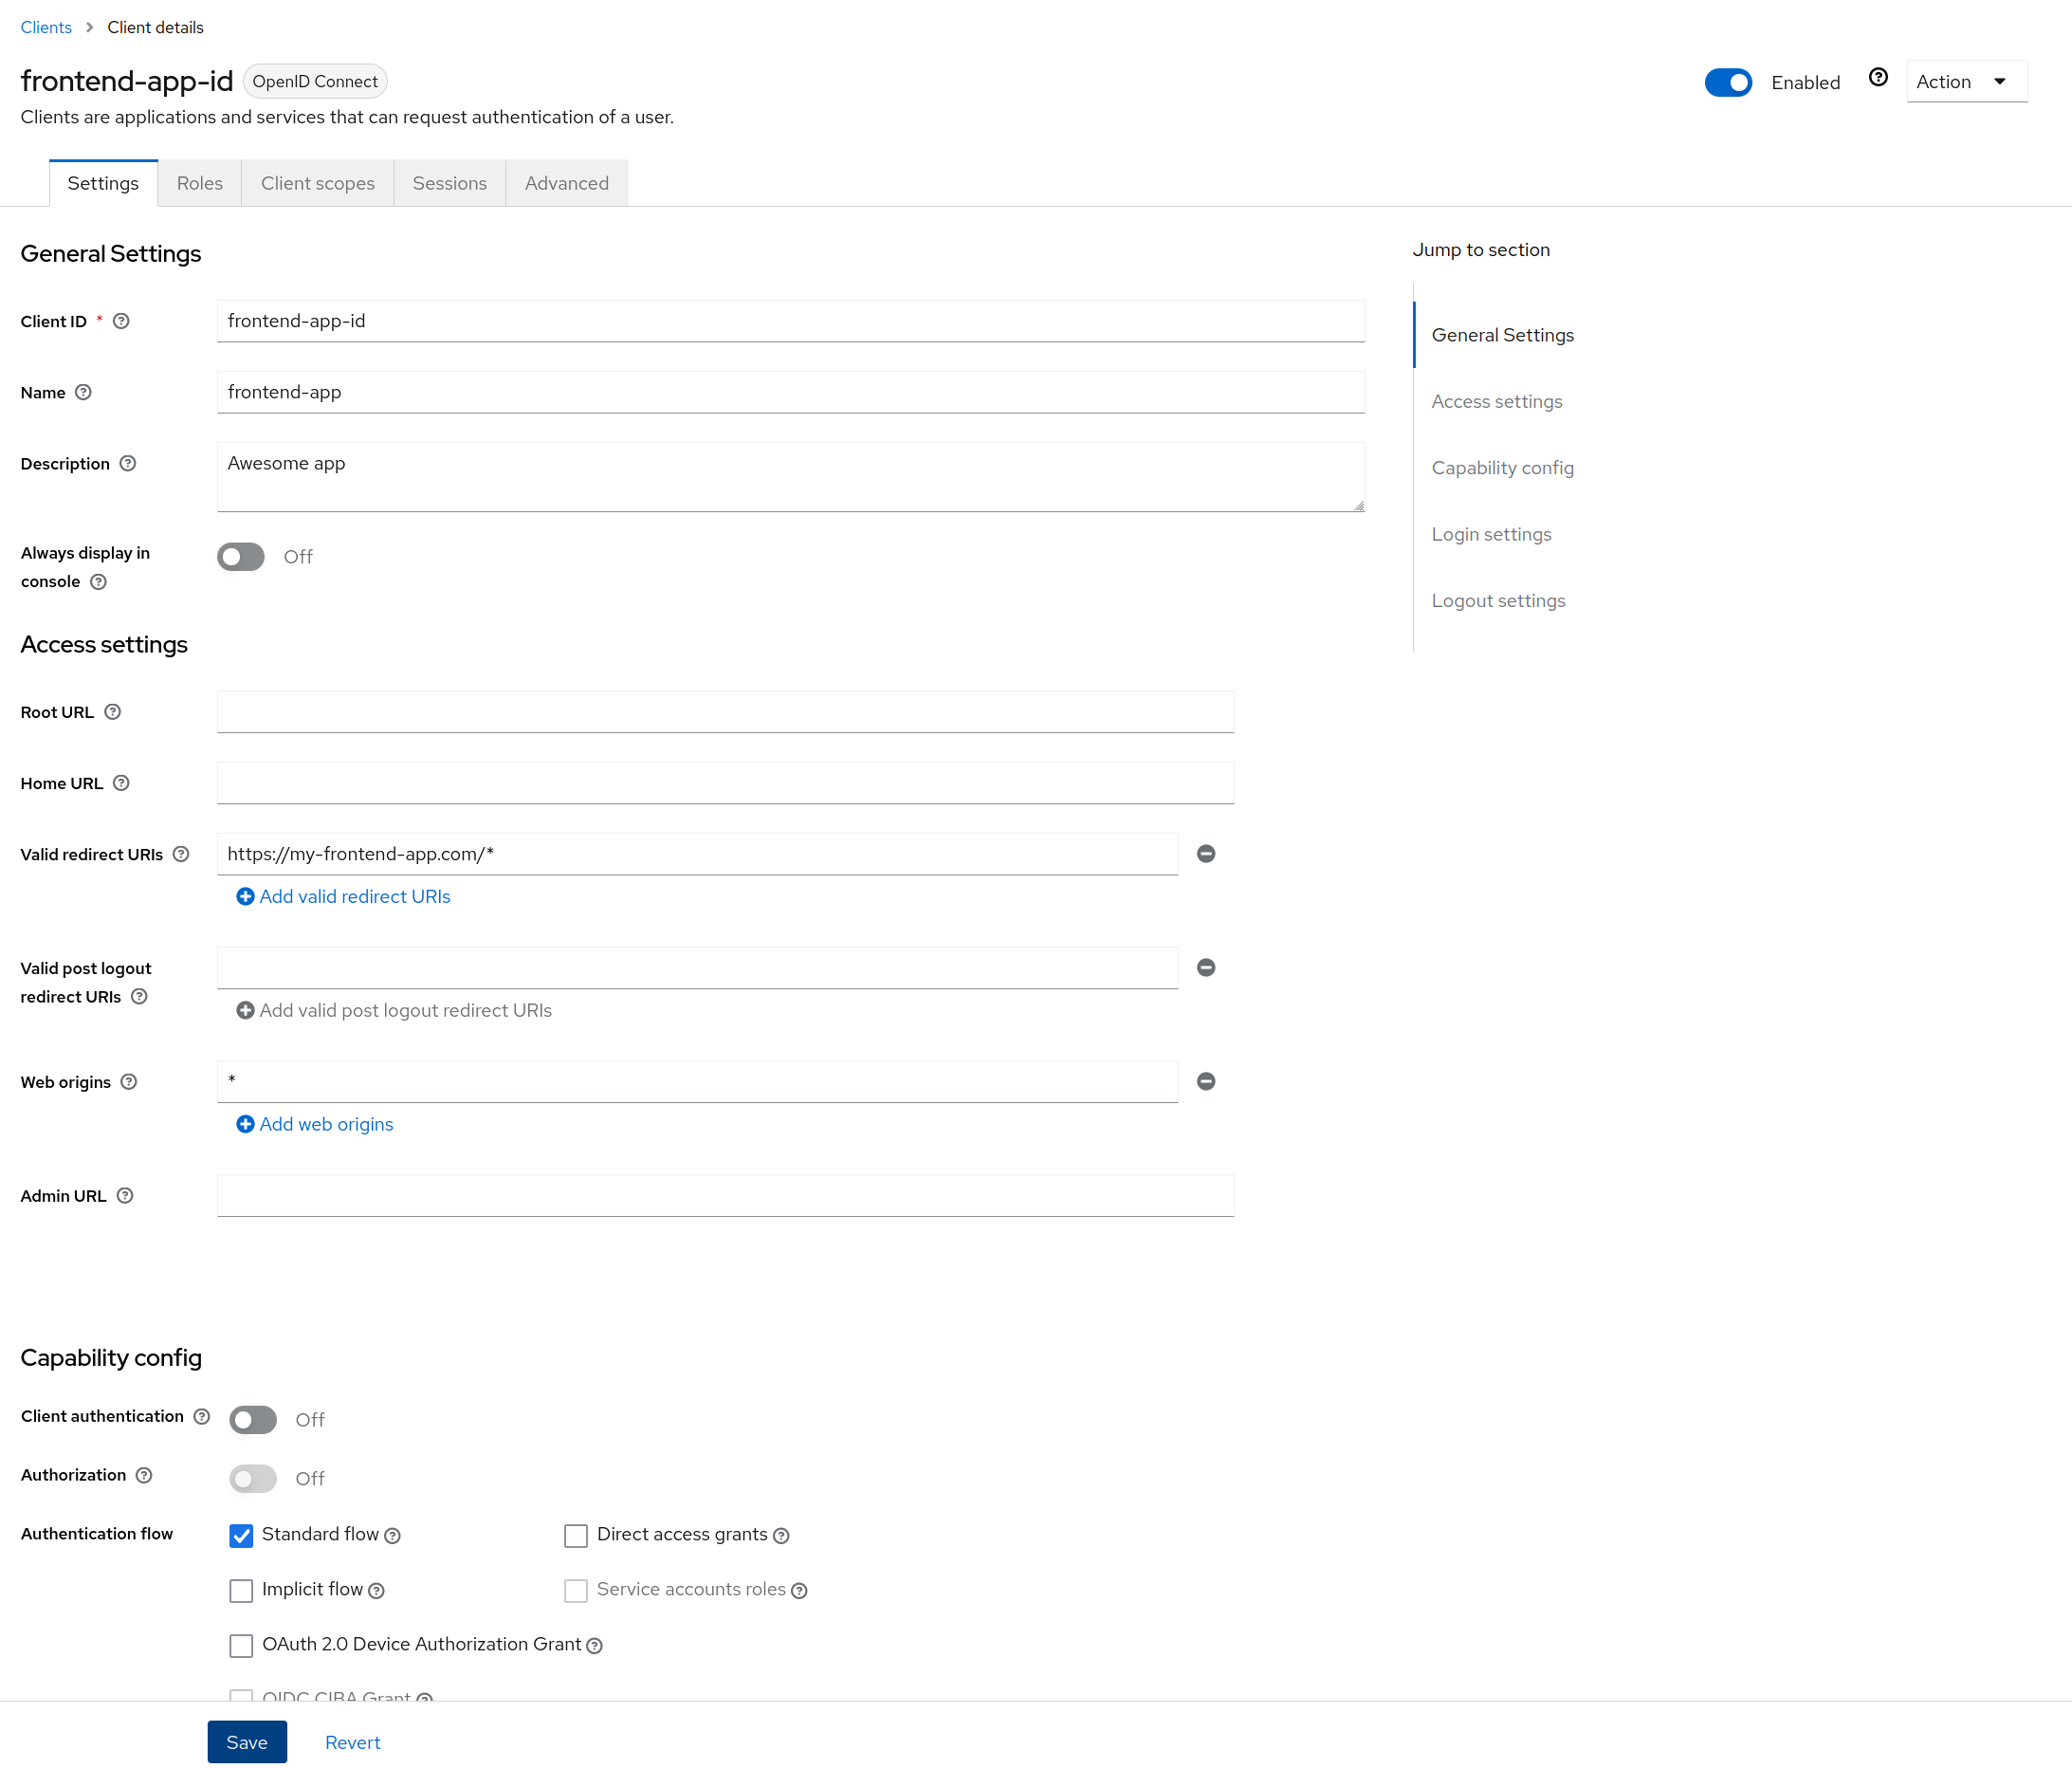
Access settings
Finally, we have to put a valid redirect URL which has to point to our front-end application. Be careful, the front end application have to handle correctly the authorization code flow in order to get the access token.
You will end up with:
Add the right default scope
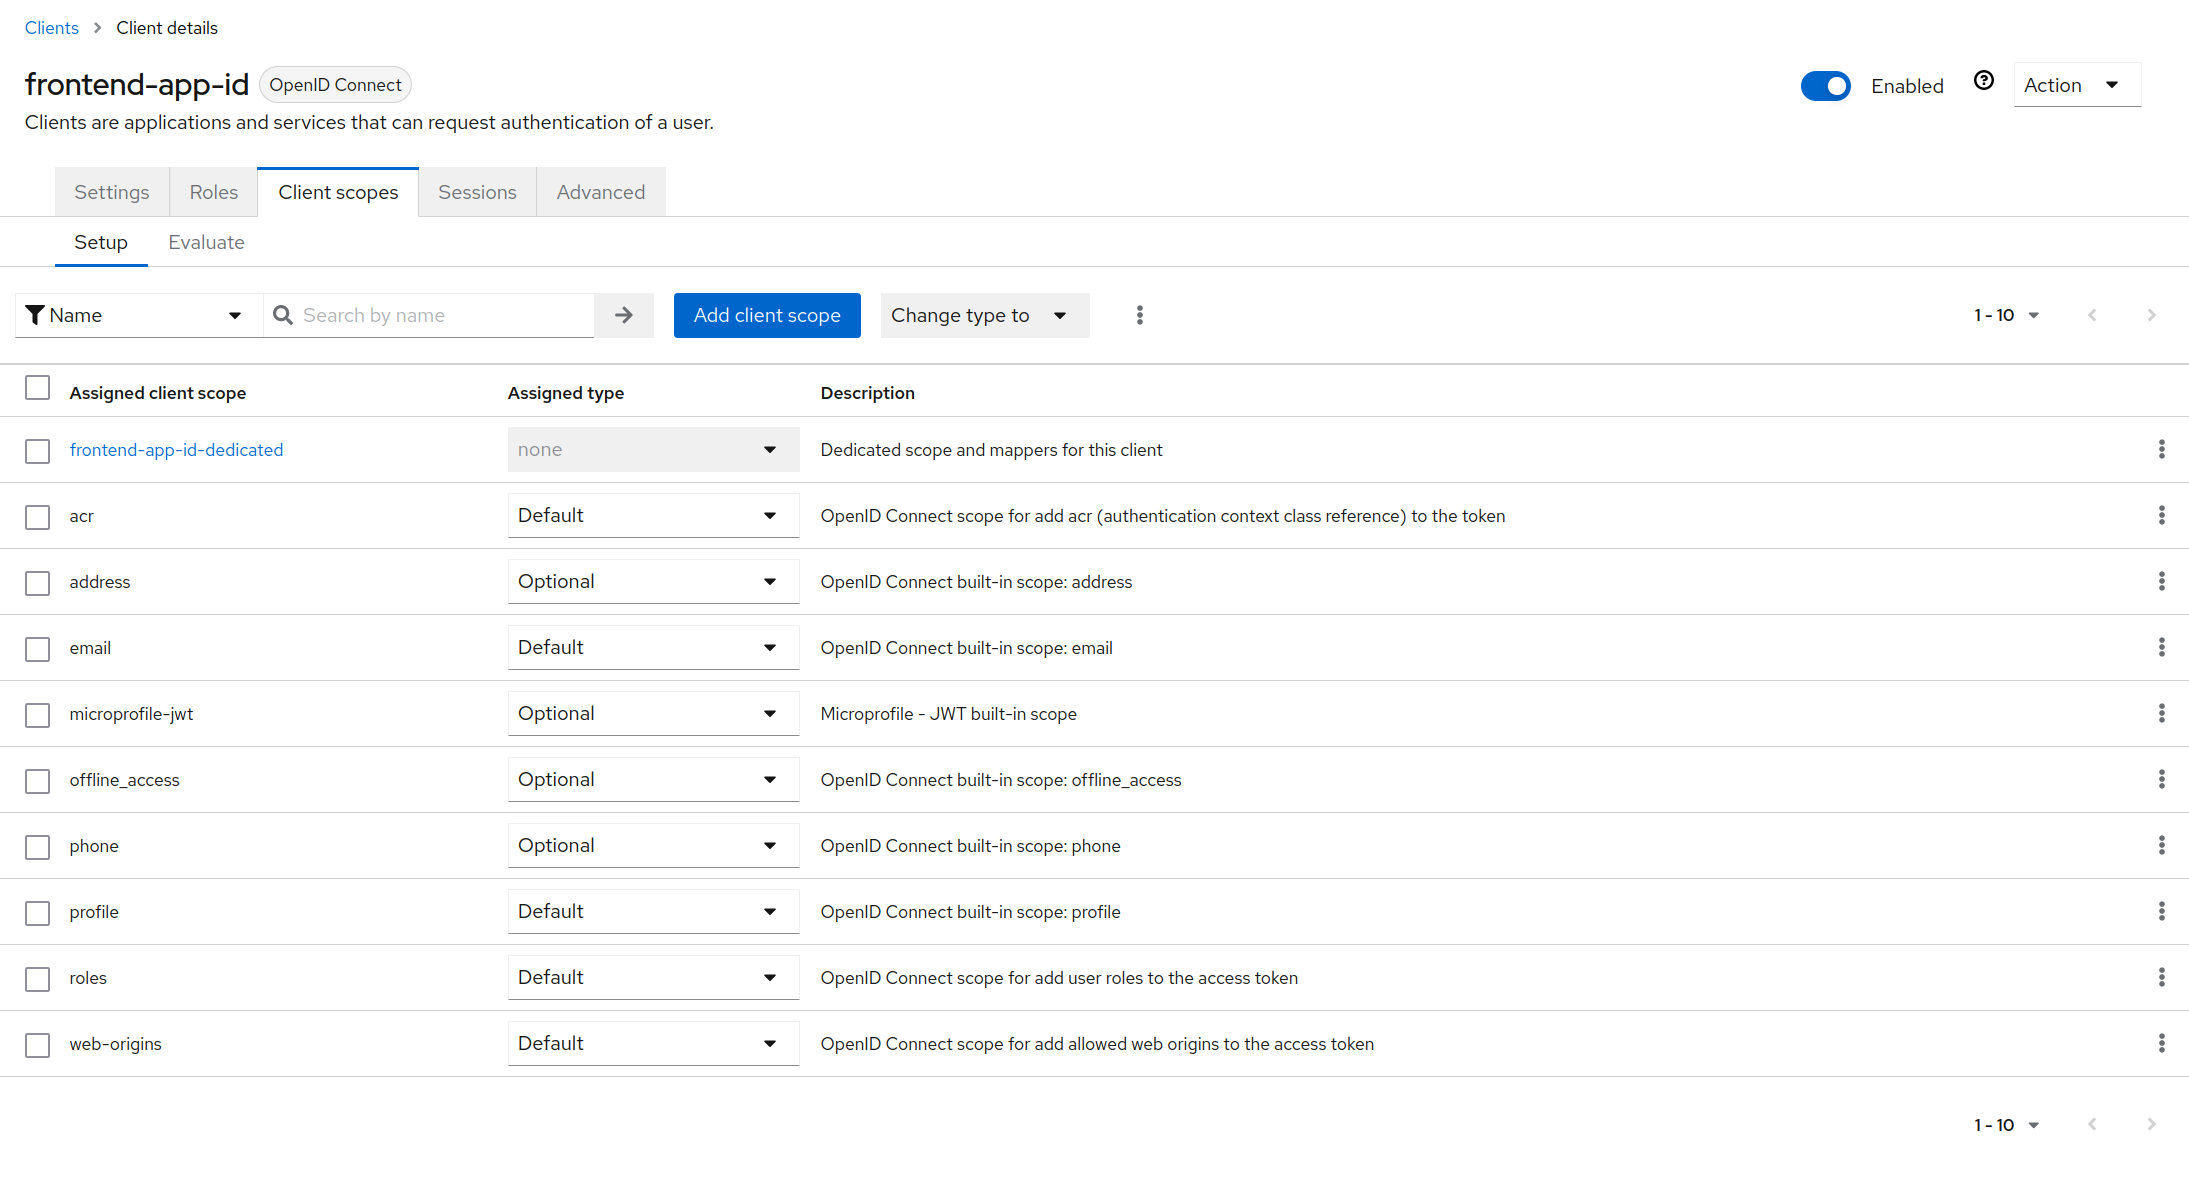
Our client is now created. But this client does not have the split-api-v2.1 scope.
Click on the Client scopes section (not in the sidebar) as following:
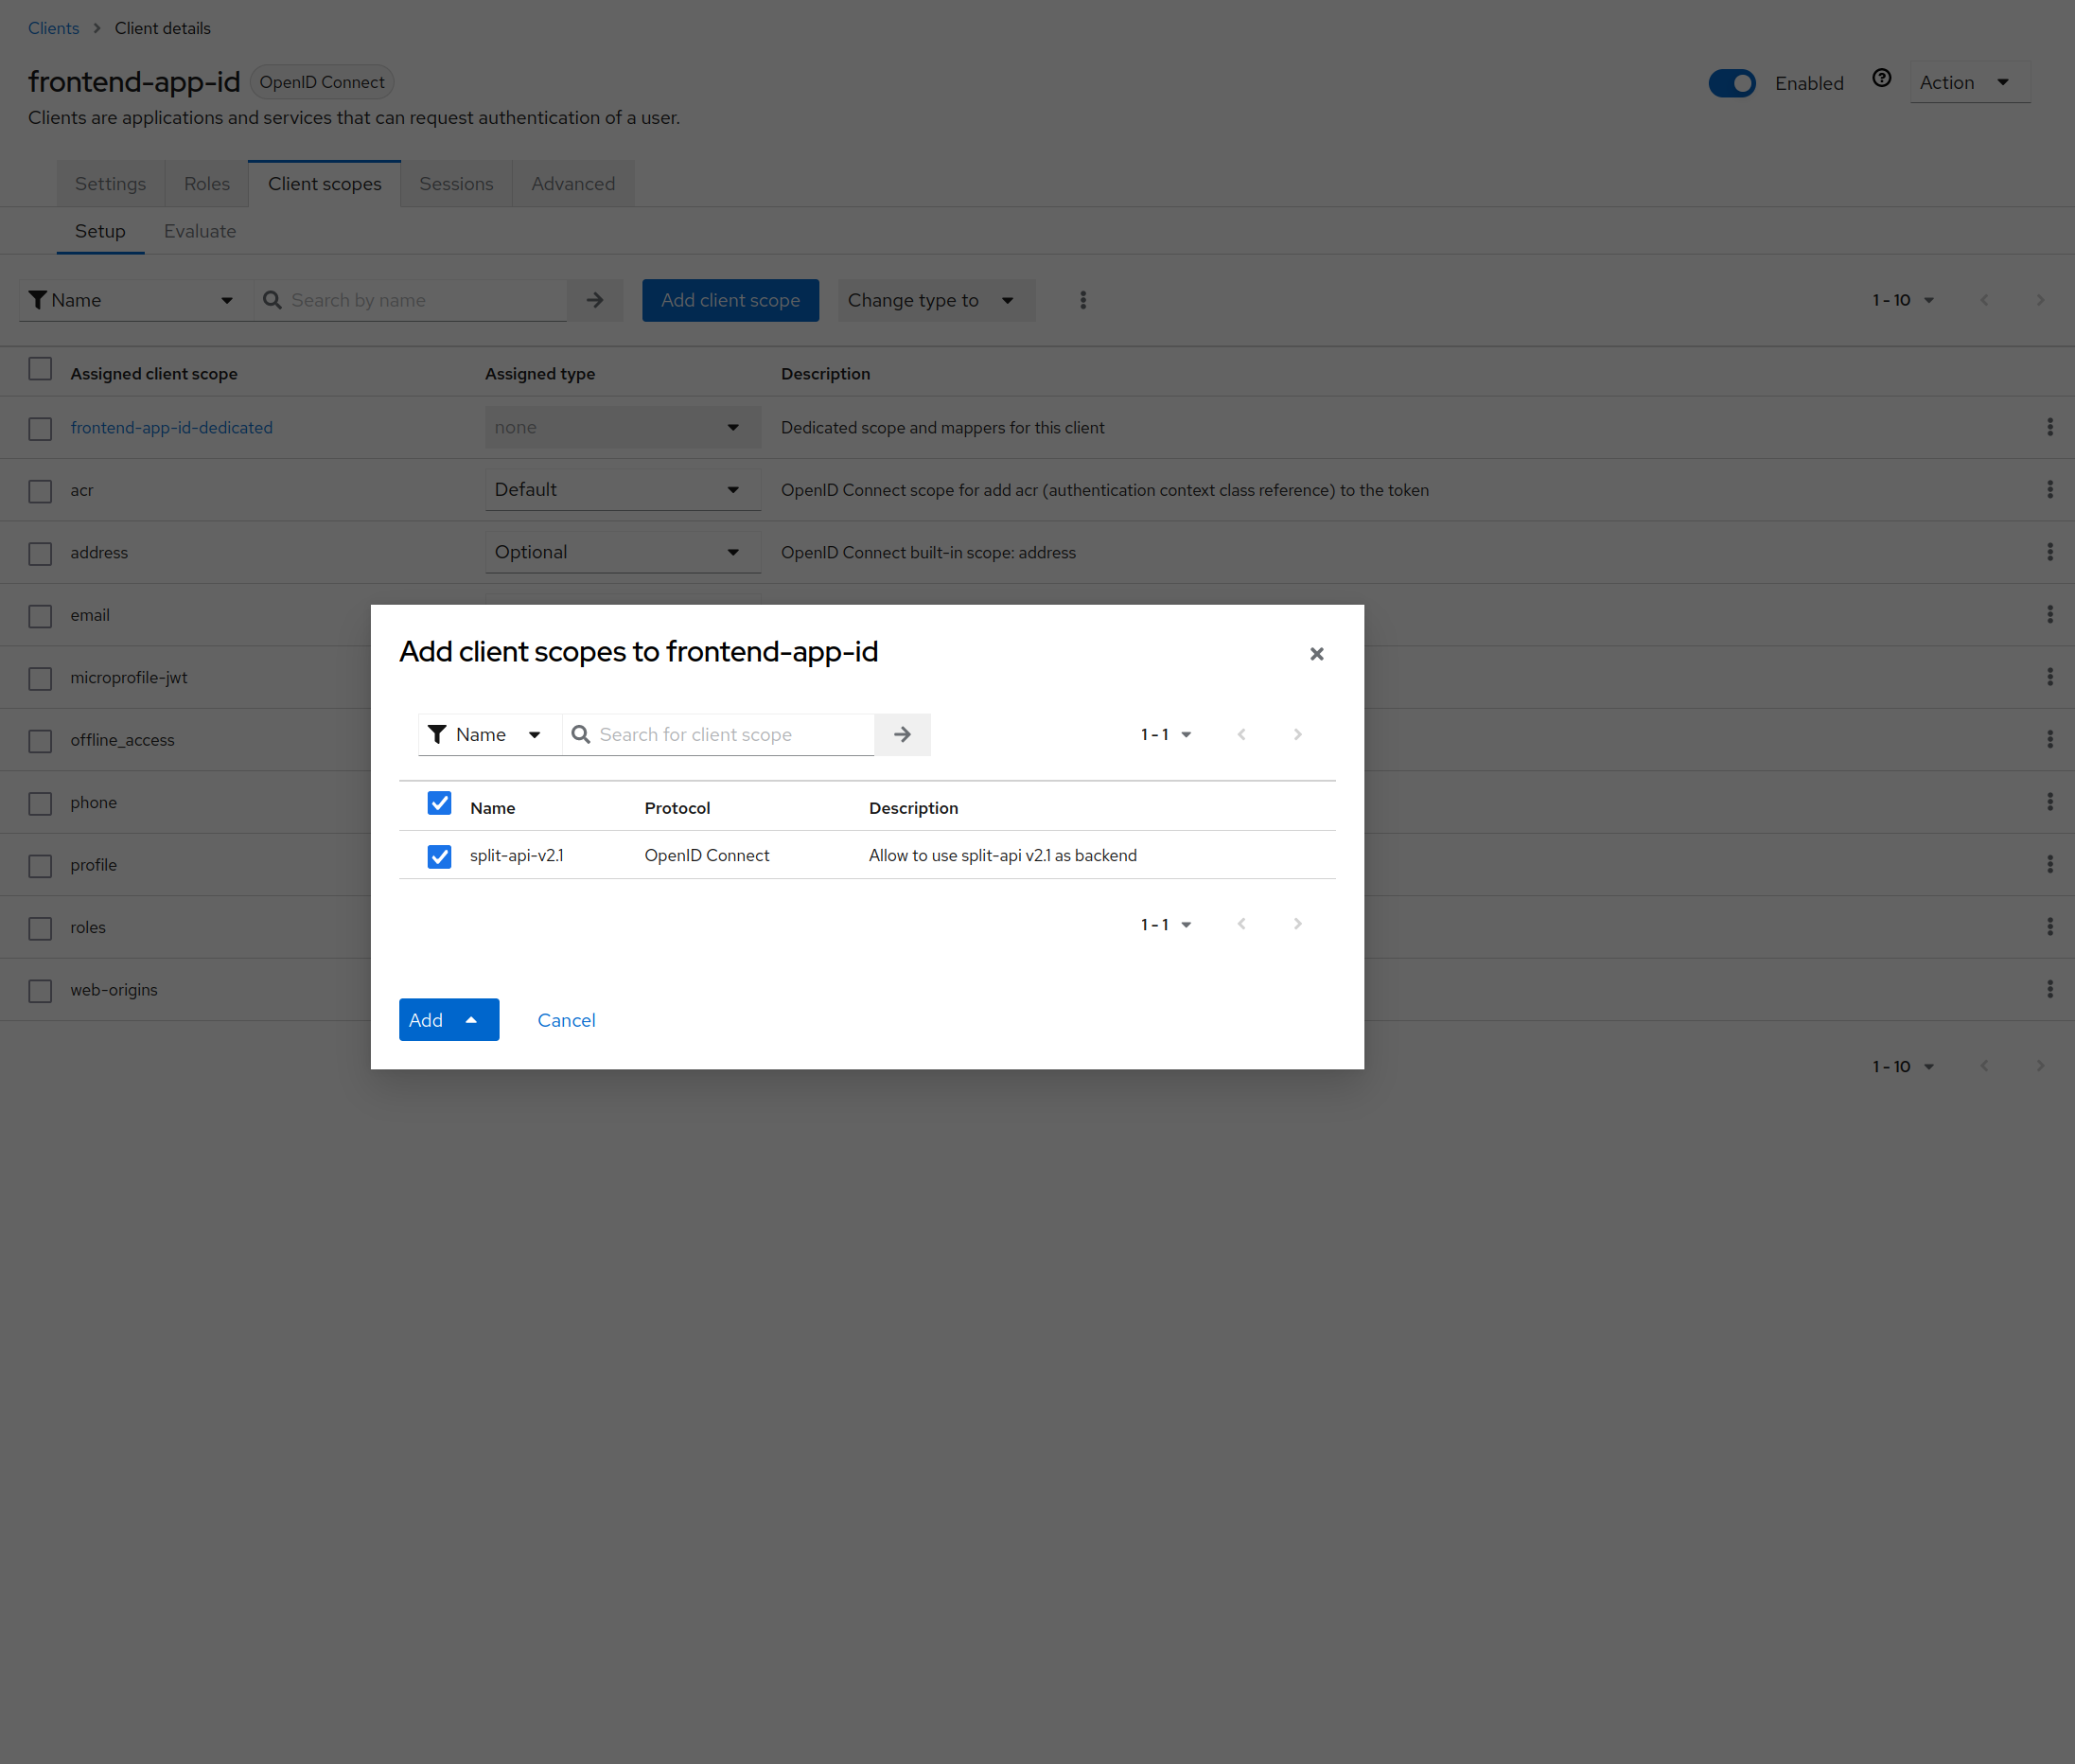
Now click on the Add client scope button and add the split-api-v2.1 scope as default:
Our client is now ready to use the Astran API v2.1
See the Getting Started of the Astran API v2.1 for the next step !